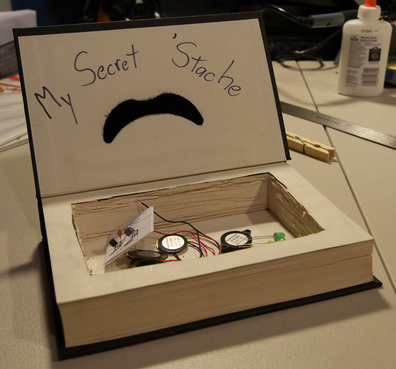

A book safe is important for any kid detective. You create a perfect hiding place in plain sight—inside a book on a shelf. They are easy to make and blend in perfectly on a book shelf, or anywhere else you’re likely to find a book lying around. I use mine to store evidence, spying tools, and other important things. I never store ham in there. It goes bad quickly.
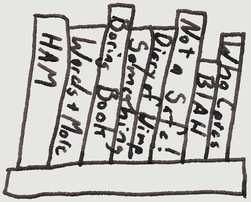
There’s plenty of ways to make this project unique, but you always want to make sure the outside of the book looks plain and boring so no one wants to pick it up and read it. The more boring the title or subject, the better. You want the title to be something like “Abridged History of Water Table Data from Colonial America”. Who would ever want to read that?
Making a “Store eBook” takes some patience. You will use a sharp box cutter, so be careful and have an adult with you when making the cuts. Just cut a few pages with each slice. If you start pushing hard on the box cutter trying to cut more, you will accidentally cut yourself.
Losing a finger is not good for a detective. Honestly, it’s not good for anyone.
Tools:
*an adult to supervise cutting
* strong clamps, about 1 - 4 (don’t use the dollar store ones)
*box cutter
*metal edged ruler
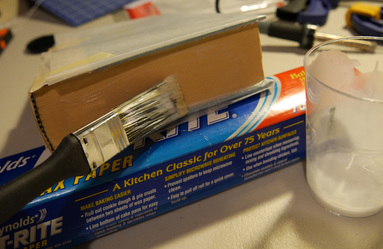
*wax paper $
*tape $
*a paint brush $
*newspaper
* strong clamps, about 1 - 4 (don’t use the dollar store ones)
*box cutter
*metal edged ruler
*wax paper $
*tape $
*a paint brush $
*newspaper
Materials:
*white school glue $
*Old hardcover book about 3 inches thick $
* small containers to mix glue in (disposable paper cups work great!) $
Optional:
*a piece of felt
*Old hardcover book about 3 inches thick $
* small containers to mix glue in (disposable paper cups work great!) $
Optional:
*a piece of felt
Steps:
1. Find an old book to use. Make sure it has a hardcover and is about 3 inches thick or more. Pick one that blends into your bookshelf, but that nobody will want to borrow. The more boring the title or subject the better.
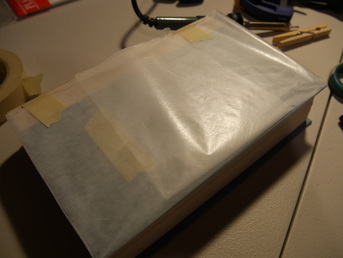
2. Open the book and the first 10-20 pages. You don’t want to cut these just in case someone ever opens the book. Wrap the cover and pages with wax paper to keep them out of the way. Using a ruler and pencil draw a shape on the page which will be the secret compartment. You can choose any shape you like, but a rectangle is by far the easiest and best use of space. My rectangle was about 1 inch from the edges of the page.
2. Open the book and the first 10-20 pages. You don’t want to cut these just in case someone ever opens the book. Wrap the cover and pages with wax paper to keep them out of the way. Using a ruler and pencil draw a shape on the page which will be the secret compartment. You can choose any shape you like, but a rectangle is by far the easiest and best use of space. My rectangle was about 1 inch from the edges of the page.

3. Find a trusted adult and have them cut out the pages with a box cutter. Use the metal ruler as a safety guide. Don’t attempt to take out all the pages at once; slow and steady wins the race. Only expose some of the box cutter’s blade and carefully cut through the pages, removing the pages after you’ve made a few cuts. You may find that after you’ve made some progress it’s easier to cut by flipping the cut pages out of the way, this way you’re not exposing too much blade. I recommend cutting the corners first so they look nice. Be careful to not cut through the back cover.
4. When you’ve cut through the pages of your book and made the rough compartment shape, wrap the back cover completely with wax paper and secure with tape. Now both covers should be wrapped. This will keep the glue from sticking to the covers.
5. In a paper cup, mix together about 5 parts glue to 1 part water. Just eyeball it. You want to dilute the glue so you can paint with it, this will give your book a more natural appearance when it dries. If you don’t do this your pages might warp and look weird, which will give away your secret stash.
6. Before you apply the glue, make sure to cover your work area with newspaper to protect it and don’t accidentally glue your book to the table. That wouldn’t be good.
7. Close the book and paint the outside edges of the book with the glue mixture. Don’t put too much, just a thin layer.
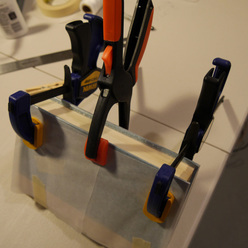
8. Clamp your book shut with at least one clamp, but it would be better if you had three or four. If you can’t find a clamp you can stack a few heavy objects on top of the “Store eBook” to compress the pages until it dries. The dollar store clamps aren’t strong enough. You really want the pages to be held tightly together or they will warp while they dry. Wait about an hour.
9. Once it is dry, add 1 or 2 more thin coats of the glue mixture to the outside edge to create a good bond and ensure the pages don’t come undone. Let the glue dry completely. This could take an hour, or maybe even 3.
10. Once dry, remove clamps and open. Leave the wax paper on the front cover, but remove it from the back cover.
11. Paint glue on the inside of the back cover where it touches the book’s pages. This will give your safe a solid bottom.
12. Get your glue water mixture again. If it is thick, mix up another batch. With a small paintbrush, add glue to the inside edges just like you did to the outside edges. When you’re finished, add the clamps again and let it dry for 1-3 hours. After the glue has dried, apply another coat of glue to inside surfaces.
13. I’ve heard of some people customizing their “Store eBook” by adding felt to the bottom or even duct tape to the insides to make the compartment look nicer.